Want to Run Macro but don’t know how to macro in Fisch Roblox game on Windows system? Don’t worry we are here to guide you.
Since Fisch Macro is launched many players have been interested in macros. It is giving amazing results every day.
Macro developers consistently fix bugs and come up with new versions to give you an amazing macro experience.
Without any further ado, let’s get started.
How to Use Fisch Macro
The procedure to use Fisch macro is straightforward. We are completing the process through display settings, autohotkey installation, Roblox settings and then Fisch settings. So follow each steps properly;
Display Settings
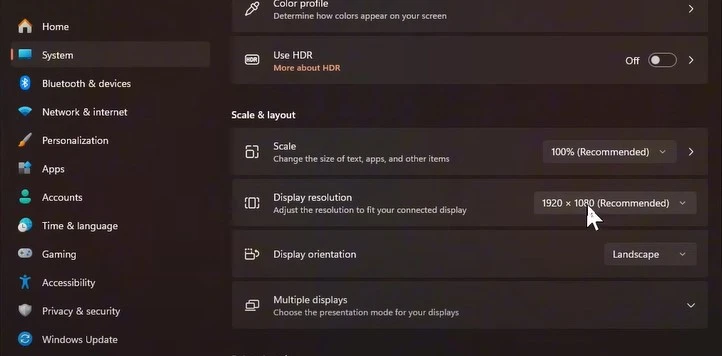
- Go to Windows search bar and search “Display Settings” (Windows + S)
- Turn of the “HDR” option (If your display unsupport HDR then it is off by default)
- Set your display resolution highest (1920*1080 is best)
- Set to display Scale 100%
- If you connect second monitor unplugged it
- Turn off windows notifications or anything that overlaying over the game.
Autohotkey Installing
During Autohotkey installing you might get blocked. To fix this problem turn off your antivirus.
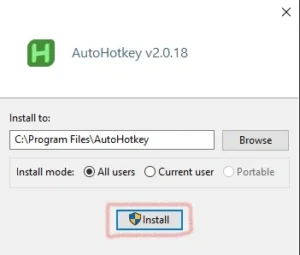
- Go to autohotkey.com and download v2.0 and v1.1 (deprecated)
- First install v2.0 and make sure it is istall on C:\Program Files\AutoHotkey path
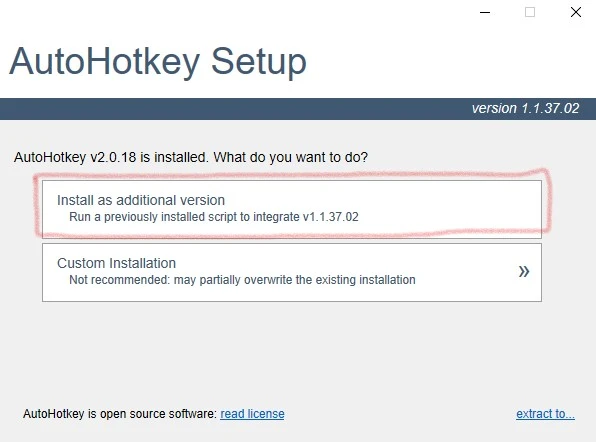
- After this install v1.1 and choose “Install as additional version”
Roblox Settings
- Use the Roblox Player (Important)
- Turn off “Shift Lock Switch“

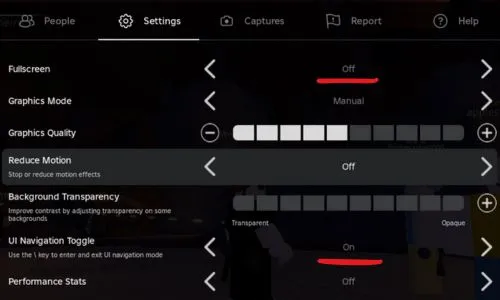
- Turn of “Fullscreen“
- Make sure “UI Navigation Toggle” is on
- Graphics Set 1
- Turn of “Chat, Leaderboard, Quest“
- Use black avatar
Fisch Settings
- Turn off “Higher Brightness” from the menu option
- Turn off “Higher Saturation”
- Enable Performance Mode
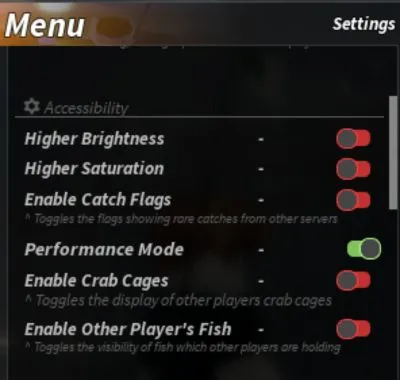
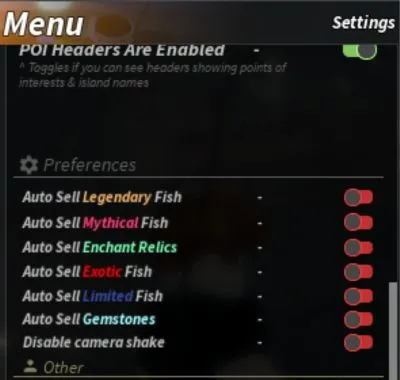
- Scrol below turn off “Disable Camera Shake” from perferences option
Fisch Controls
After complete the process, now it’s time to start macro. Macro developer gives you only start, stop & reload control.
- Enter “P” to Start Macro
- Enter “O” to Reload Macro
- Enter “M” to Exit Macro
Xan Macro Settings
Xan macro has a new UI interface but don’t worry follow the steps to use. After downloading launch Xan v2.1 & you will see there are 4 tabs. I will guide you about each tab and their settings.
Xan Main Tab
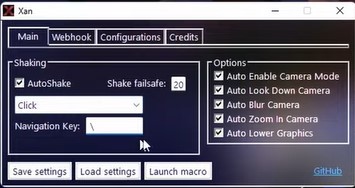
- In the main tab check “Autoshake” Option and put 20 in “Shake Failsafe” option.
- Now select “Click” option for shake and select the navigation key to “\”
- Now “Check” all options (Auto Enable Camera Mode, Auto Look Down Camera, Auto Blur Camera, Auto Zoom in Camera, Auto Lower Graphics)
- Click on “Save Settings”
Configurations
Configuration settings are applied by default. Also, you can change it according to your need.
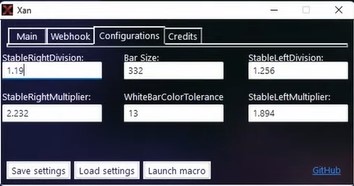
Now click “Load Settings” then “Launch Macro”. That’s it, you are using Xan Fisch macro.
Fisch Macro v12 Settings
Fisch macro v12 launched recently. It has Webhook Support, GUI to make setting changing easier, Able to use Bait while fishing, A more accurate minigame features. The best part is your applied settings automatically save to your computer in txt format. Also, you can read minigame settings documents for better experience.
There are 3 tabs in fisch macro v12 follow the steps below;
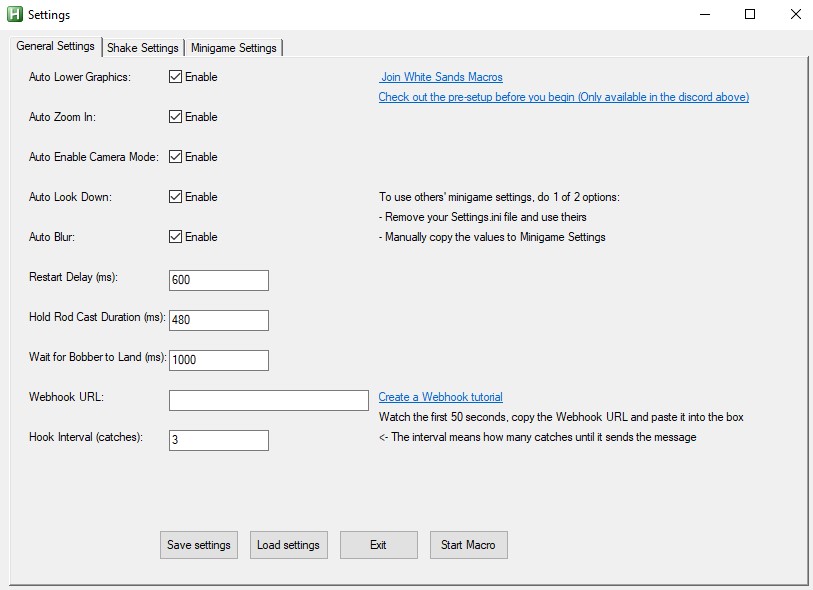
General Settings
- Check Auto Lower Graphics, Auto Zoom in, Auto Enable Camera Mode, Auto Look Down, Auto Blur options.
- If you have a webhook URL paste the links
Shake Settings
- Choose Shake settings between “Click” & “Navigation”
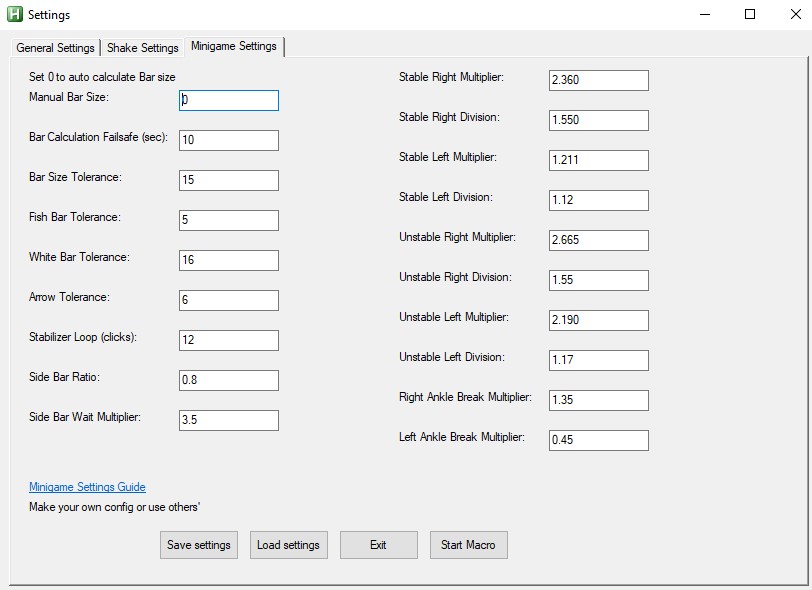
Minigame Settings
- Minigame settings already applied but if you want to change settings please read this documents.
- Now click “Save Settings” then “Load Settings”
- Now “Start Macro”
So that is all for fisch macro. If you are stuck in any process please reread the instructions. Thank You